Tutorial: Bangladesh → Dhaka → Madaripur
The same study_area presets for a Bangladeshi study area: country → division → district.
Bangladesh boundaries are bundled (offline); the terrain panel uses Copernicus GLO-30
(pip install "acadgis[terrain]"). Every figure below is generated by the code above it.
Setup
import acadgis as agis
print("AcadGIS", agis.__version__)

STEPS = [("division", "Dhaka"), ("district", "Madaripur")]
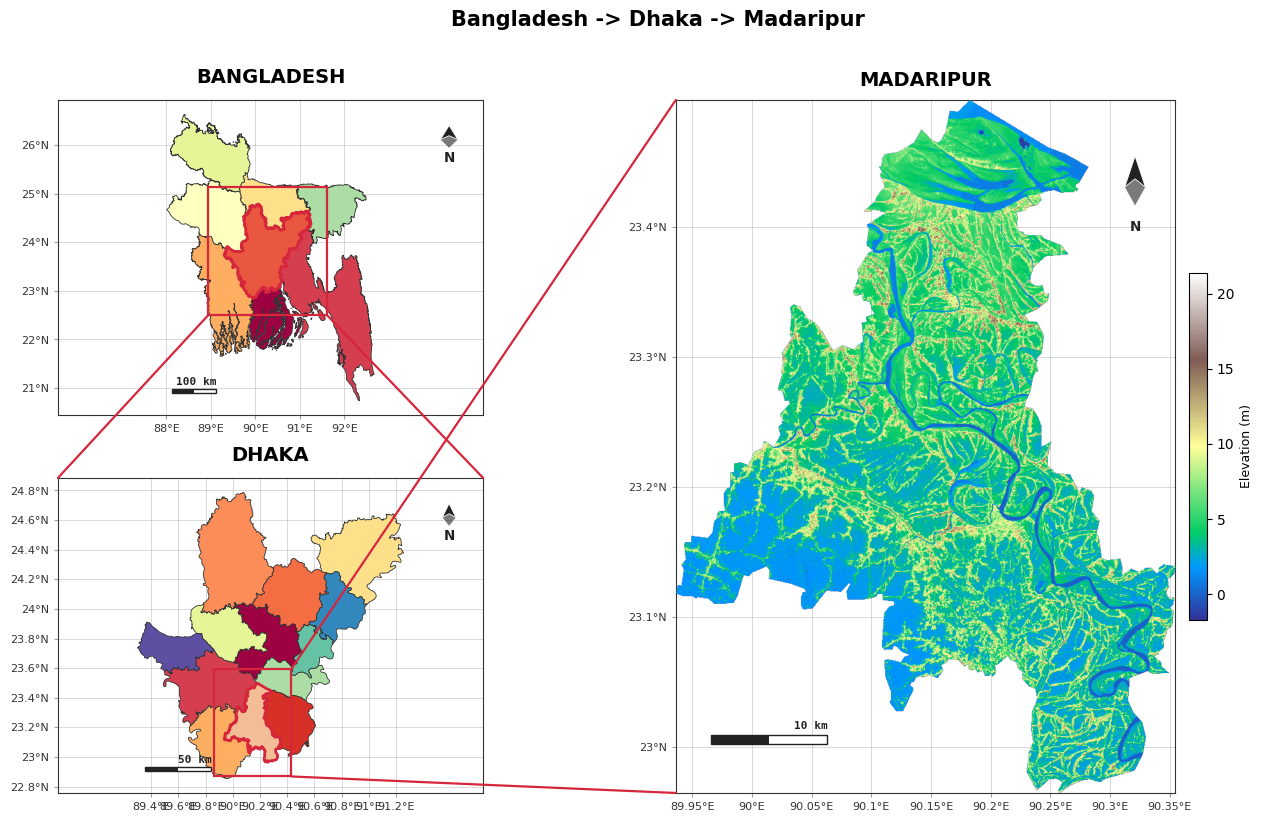
Cascade — Bangladesh + Dhaka (small) + Madaripur terrain (focus)
agis.study_area("Bangladesh", steps=STEPS, template="cascade",
                terrain=True,
                suptitle="Bangladesh -> Dhaka -> Madaripur")
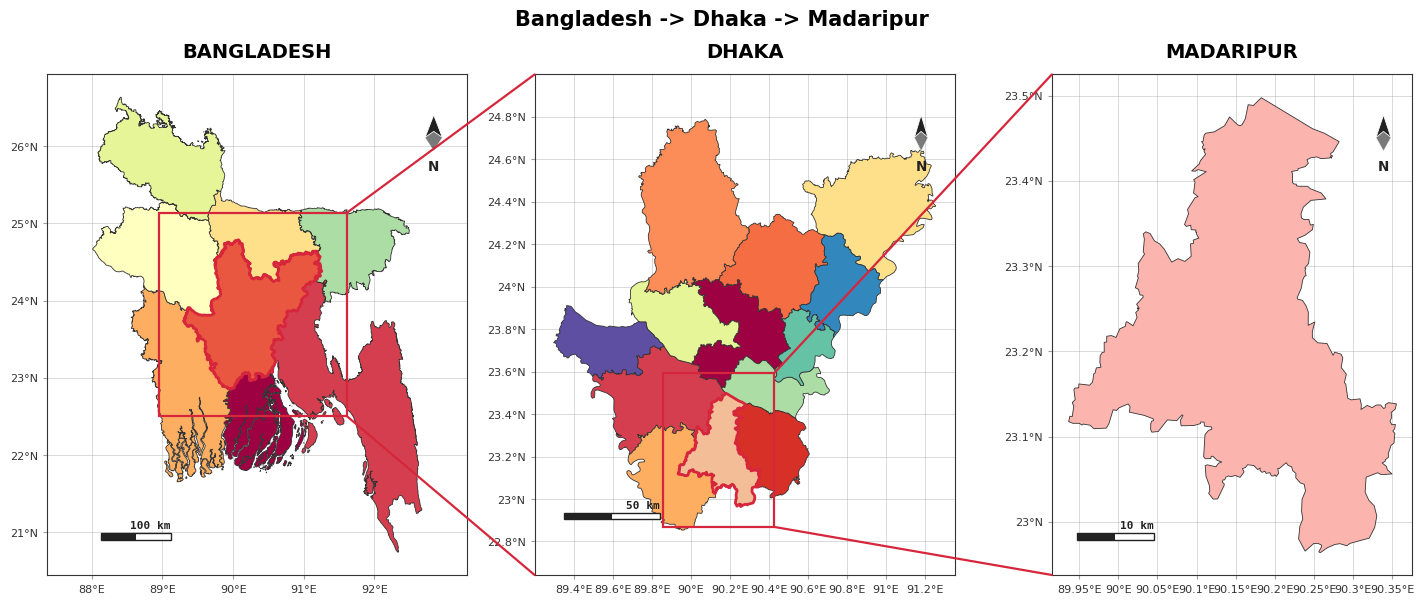
Series — three uniform panels (division highlights district)
agis.study_area("Bangladesh", steps=STEPS, template="series",
                suptitle="Bangladesh -> Dhaka -> Madaripur")
Low delta
Bangladesh is a low delta, so Madaripur's relief is gentle — a few metres. Swap terrain=True
for polygon detail, or change the district, with the same call.
Customization showcase
New study_area options: uniform_panels (equal panel boxes), highlight_style
(overlay / rect / circle), per-panel graticule & graticule_interval, per-panel
north_arrow / scale_bar, plus all the connector and colour knobs.
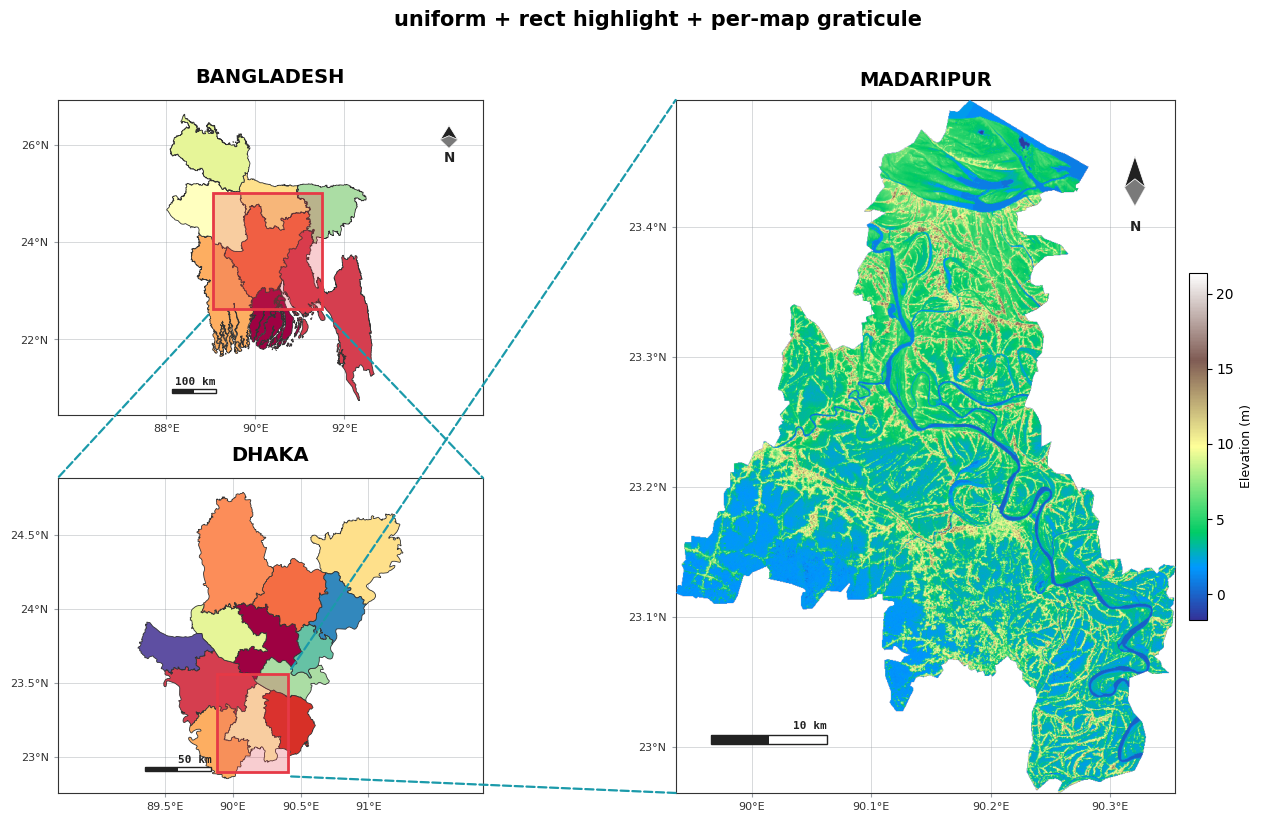
A. Uniform panels + rectangle highlight + per-map graticule
uniform_panels=True keeps Bangladesh and Dhaka the same size. Graticule spacing is set per
map ([2, 0.5, 0.1] degrees).
agis.study_area("Bangladesh", steps=STEPS, template="cascade", terrain=True,
                uniform_panels=True,
                highlight_style="rect", highlight_color="#e63946",
                highlight_alpha=0.25,
                graticule=[True, True, True], graticule_interval=[2, 0.5, 0.1],
                north_arrow=[True, False, True],
                link_color="#1b9aaa", link_style="--", box=False,
                suptitle="uniform + rect highlight + per-map graticule")
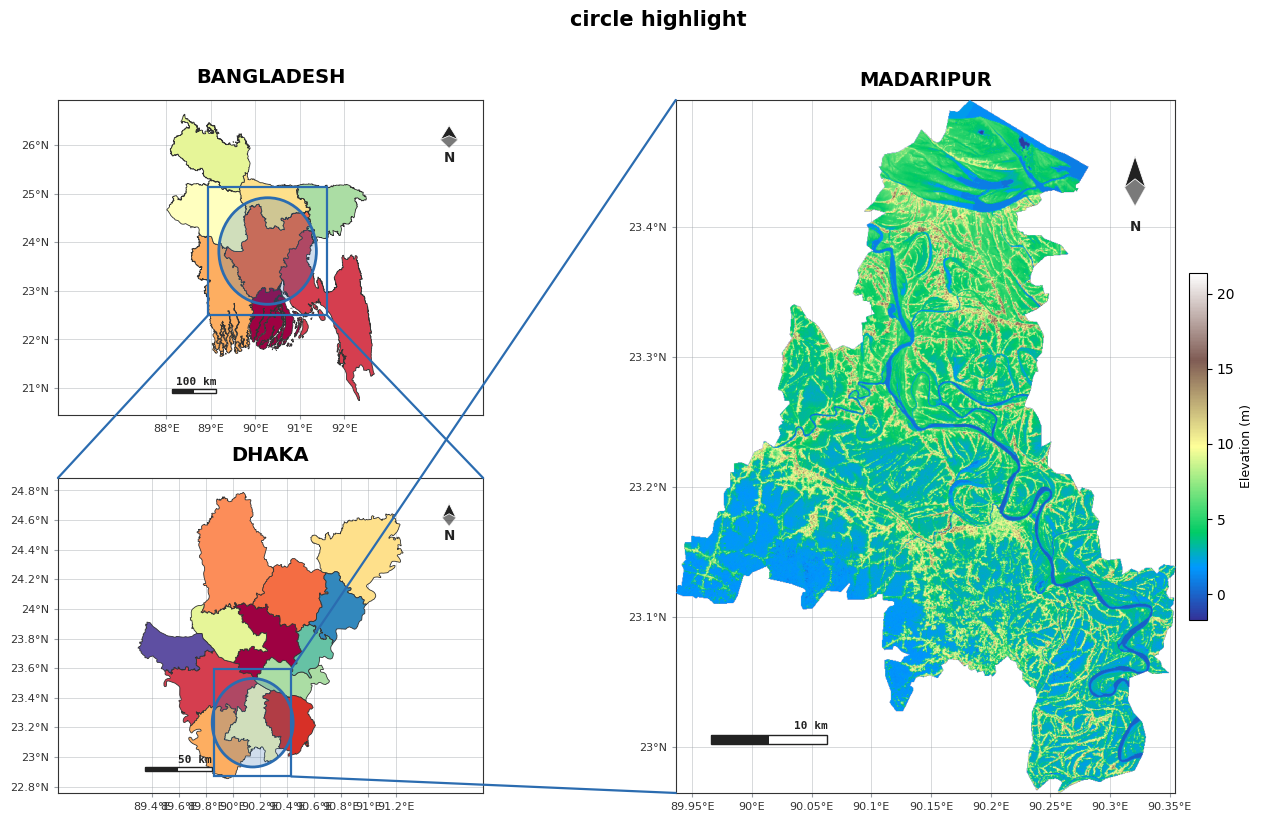
B. Circle highlight
agis.study_area("Bangladesh", steps=STEPS, template="cascade", terrain=True,
                highlight_style="circle", highlight_color="#2b6cb0",
                highlight_alpha=0.22, suptitle="circle highlight")
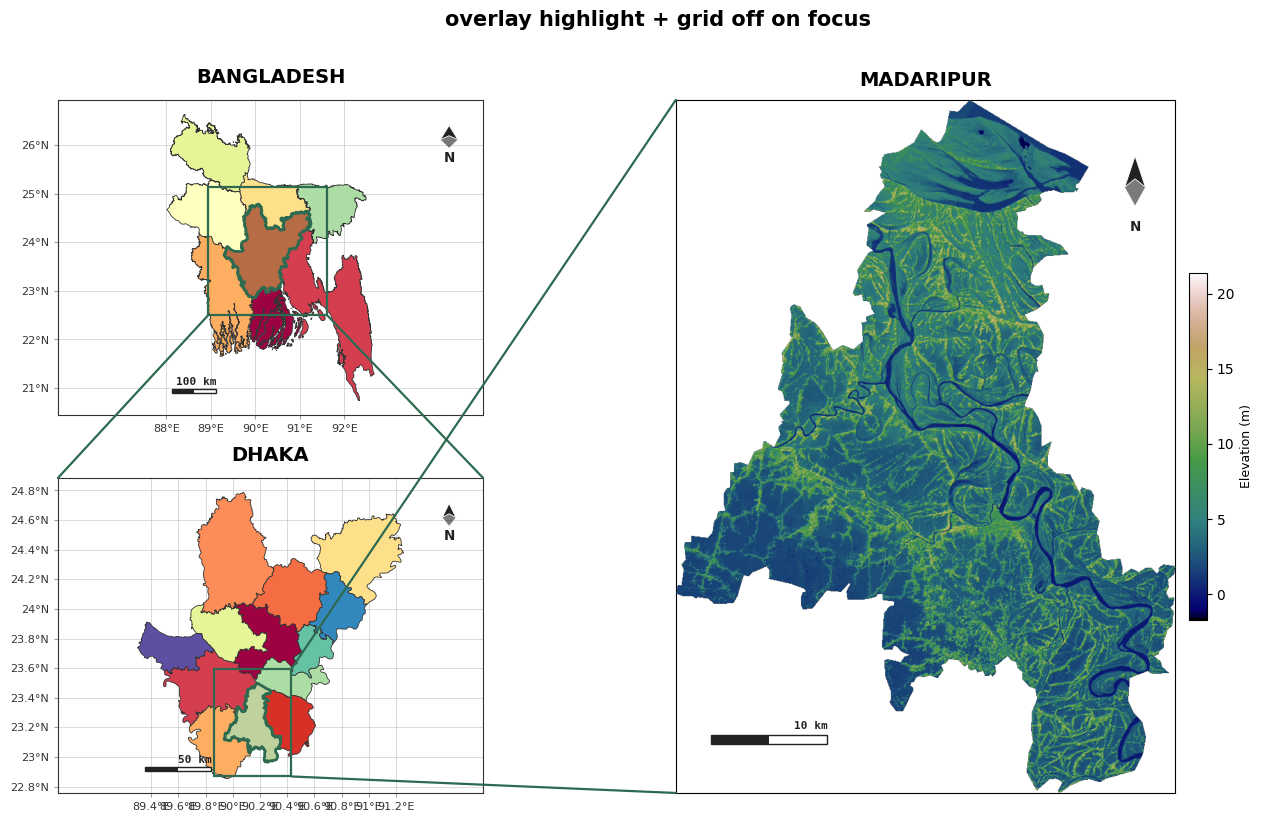
C. Border-overlay highlight + grid off on the focus map
highlight_style="overlay" draws the region border with a colour fill; graticule=[True, True,
False] turns the grid off on the big panel.
agis.study_area("Bangladesh", steps=STEPS, template="cascade", terrain=True,
highlight_style="overlay", highlight_color="#2d6a4f",
graticule=[True, True, False], cmap="gist_earth",
suptitle="overlay highlight + grid off on focus")
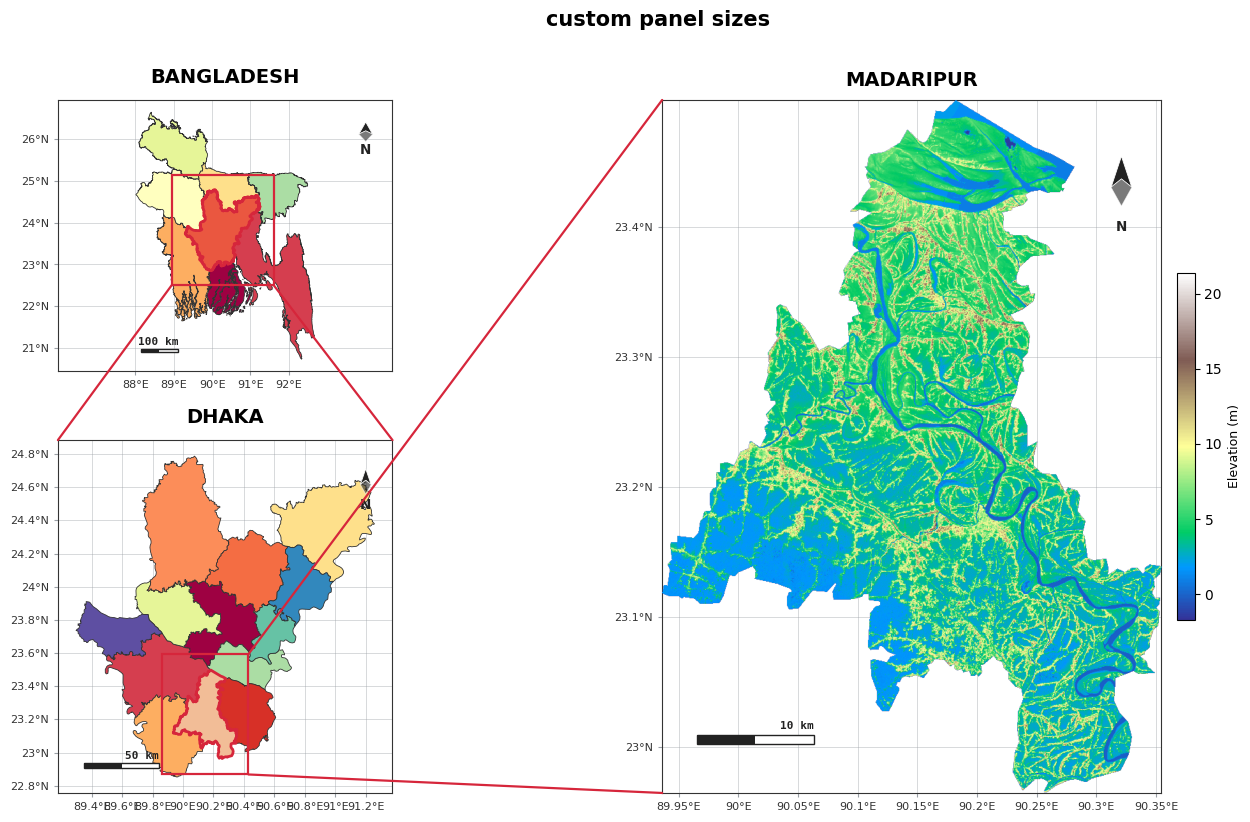
D. Resize each map
Make the focus panel bigger and the top context map shorter with custom ratios.
agis.study_area("Bangladesh", steps=STEPS, template="cascade", terrain=True,
                width_ratios=[1, 2.4], height_ratios=[1, 1.3],
                wspace=0.18, hspace=0.22,
                suptitle="custom panel sizes")
Export
fig = agis.study_area("Bangladesh", steps=STEPS, template="cascade", terrain=True)
agis.save(fig, "bangladesh_madaripur.pdf", dpi=300)
Next: the layout presets tutorial walks through all five templates, or see the Study-area layouts guide for every parameter.